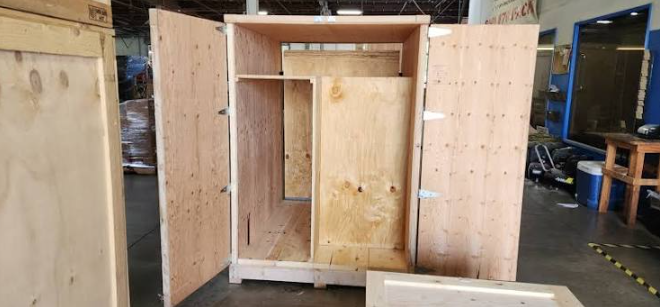

Exhibition crates often make an outbound trip and then return through a different carrier or warehouse. Give the crate a stable asset ID and keep each trip’s shipping code temporary. A label that still shows last month’s venue can send an expensive display to the wrong place.
Keep Asset and Route IDs Separate
A permanent crate number should identify the case over many events. A direct thermal label can carry the current show and routing details for one movement. Scan both when loading. At the event, the crew should know which code identifies the crate and which label must be replaced before the return trip.
Remove Old Routing Information
Flight cases accumulate carrier stickers and venue labels. Before printing a new route, remove or cover obsolete machine-readable codes so handlers see only the active shipment. Preserve any durable asset plate and safety markings. Check all sides of the case, because an old code on a hidden panel may still be scanned at a conveyor or dock.
See also: How Do You Label Book Subscription Packages Without Mixups?
Choose a Protected Panel
Painted wood, plastic, and metal corners behave differently under adhesive. A recessed flat panel or document pouch may protect a replaceable label from abrasion. Do not wrap a barcode around a corner or place it under a latch. Test the final position while the crate is stacked and strapped in its usual orientation.
Plan the Return Before Shipping Out
Create the return record and label procedure before the exhibition opens. The return destination may differ from the origin, and the crew may not have the same printer at the venue. Keep a controlled spare label or print method, but activate the correct trip code only when the return is confirmed. Scan and inventory contents before closing the crate.
Define the Job Before Choosing Stock
Write down exactly what the label on exhibition display crates must accomplish during outbound shipping, event storage, and return transit. Decide which field a worker reads, which code a scanner captures, and when the information can be retired. The working data may include crate ID, show ID, destination, and return route; distinguish fields that must be printed from those better kept in the inventory system. Decide who owns an incorrect record and how it is corrected. A label specification based only on dimensions misses the process that gives the printed mark its meaning.
Match Adhesive to the Real Surface
Test the proposed adhesive on painted wood cases, plastic flight cases, and attached document pouches, using the exact material supplied to production. Apply it at the normal work area temperature and inspect it after the planned dwell, not only after a few minutes. The main challenges here are multiple venues, old shipping codes, scuffed surfaces, and case reuse. A stronger adhesive may hold better but can create residue or damage during removal. If direct application is unreliable or undesirable, assess a durable case ID plus replaceable route insert. Keep approved samples from each packaging or carrier supplier so a later material substitution triggers a targeted retest.
For this application, compare exhibition crate labels on the actual painted wood cases, plastic flight cases, and attached document pouches and through the planned handling interval. Ask for samples before choosing a full production roll.
Choose the Roll and Printer Together
Confirm print width, label height, gap or black-mark sensing, roll core, outside diameter, winding direction, and printer feeding limits before ordering. A roll that shares the same face dimensions can still jam or print backwards if its core or winding is wrong. Use the production template and print a long enough run to reveal feed drift, adhesive ooze, or die-cut variation. Record the approved printer settings with the roll specification. Recheck them when a device, converter, or template changes.
Make Every Scan Deliberate
Design the barcode for the scanner and distance used with exhibition display crates. Leave the required clear margin, preserve contrast, and keep the code away from folds, seams, edges, or moving parts. Put the most useful human-readable identifier beside it so staff can spot a mismatch. If more than one code appears on the object, state which workflow uses each one and remove obsolete routing codes. Print the longest data value and smallest label in the test set; a short sample code can hide layout problems.
Apply the Label at a Repeatable Point
The preferred position is a flat protected case panel or document pouch. Apply only after the object or package has reached the form it will have during normal handling. Remove loose dust or moisture where the process permits, press across the entire label, and check the corners. Give workers a simple placement guide showing the approved zone and the areas to avoid. If the application surface changes between suppliers or batches, check a few finished units before the shift continues. An attractive label applied in the wrong place is still a failed label.
Run a Trial That Mirrors Use
Print a production roll and test it on the hardest version of exhibition display crates, then follow it through outbound shipping, event storage, and return transit. Check printer feed, initial readability, adhesion, edge lift, and scanning at each real handoff. Include the worst expected combination of multiple venues, old shipping codes, scuffed surfaces, and case reuse. Keep both successful and failed examples with the time and conditions recorded. If a sample fails, change one factor at a time, such as placement, adhesive, size, or print settings. This makes the result useful for purchasing rather than a vague pass or fail.
Control Reprints and Old Labels
A torn label, wrong template, or corrected record needs an explicit replacement path. Reprint from the verified current record, not from memory or a photograph of the old label. Where identifiers are unique, preserve the link to the original record and mark a failed print as void if the system supports it. Remove or cover an obsolete active code so a scanner cannot select the wrong one. Document who authorizes a new label when the physical item and the digital record disagree.
Give the Supplier an Approval Specification
Send a sample of painted wood cases, plastic flight cases, and attached document pouches, the printer model, a dimensioned label drawing, roll geometry, required data and barcode layout, expected life, and the environmental conditions described above. Ask for converted-roll samples of the proposed construction. Agree on the acceptance test before a bulk order, including feed performance, scan success, bond after normal handling, and removal behavior when relevant. Record the approved material, adhesive, liner, die cut, and winding as one controlled specification. Compare cost per successfully labeled unit rather than only the blank-label price.
When evaluating direct thermal labels for exhibition display crates, give the supplier the real surface, printer details, and pass criteria rather than a size alone.